Hey all! Just updated the menu for summertime! There are some amazing new combinations, reminiscent of all those summertime childhood memories we all think of so fondly. From yummy lemon to campfire s'mores, this new line up truly encapsulates all things summer! So mosey on over and have a little peek! http://ovenwarm.blogspot.co.uk/p/ovenwarm-menu-summer.html
Until next time!
xo Jenn

BAKING THAT LOVES YOU BACK
Showing posts with label baking. Show all posts
Showing posts with label baking. Show all posts
Tuesday, 28 May 2013

Friday, 17 May 2013
Cinnamon Roll Pancakes
This little gem of a recipe I have been DYING to try and it turns out my husband's birthday was the perfect excuse to bust it out. Not to mention all the positive feedback I received on them! Now I'm not gonna mess around with y'all, the recipe does take a bit of time but I promise you that it is worth every minute! This gooey, cinnamon-pancake pleasure center is the reason that I enjoy cooking as much as I do. I don't think that I can make just regular pancakes ever again..they are just, so plain.
-001.JPG)
-001.JPG)
I have been fantasizing about cinnamon rolls for a long time, but they are so finicky to make, and don't even get me started on the waiting time! An unhealthy obsession led to a train of cinnamon-roll inspired dishes: porridge, cookies, cake, smoothie (yup, I regret that one a bit). Many of these experiments left me feeling less that satisfied. I wanted ooey, gooey, soft and warm cinnamon sugar lovin' that these treats just could not provide. And then I stumbled on the most amazing recipe for cinnamon roll pancakes...WHY HAVEN'T I THOUGHT OF THIS BEFORE?
The original recipe is courtesy of the lovely Lori from the Recipegirl blog, and is ever so slightly tweaked to make it a bit easier on y'all.
This recipe has a secret to replicating that cinnamon sugar swirl that is unique to cinnamon rolls, which is surprisingly easier than you may think. In addition to the pancake mix, you mix up a cinnamon sugar filling which is literally swirled onto the cooking pancake and then flipped. The swirl of sugar caramelizes from the heat of the pan and leaves little dents in the surface of the pancake, just like a cinnamon roll, leaving behind gooey cinnamon sugar goodness. Genius, right?
And why leave it at that? I mean sure, cinnamon sugar pancakes are fantastic, but drizzle on some cream cheat (yes, that was 'cheat' on purpose) glaze and you are singing. Seriously, these are phenomenal!
So without further delay, here is the magic that is Cinnamon Roll Pancakes. Enjoy friends, enjoy.
-001.JPG)
Cinnamon Roll Pancakes
makes approx. six 4-inch pancakes
Ingredients:
Pancakes
1 cup plain flour
2 tsp. baking powder
1/2 tsp. salt
1 cup buttermilk (regular milk is okay too)
1 large egg, lightly beaten
1 Tbsp. vegetable oil
1 tsp. vanilla extract
Cinnamon filling
4 Tbsp. butter, melted (NOT boiling)
1/4 cup + 2 Tbsp. of packed dark brown sugar (light is also okay)
1/2 Tbsp. ground cinnamon
Cream 'cheat' glaze
1/4 cup vanilla yogurt
3/4-1 cup confectioner's sugar (more or less for desired glaze consistency)
Method:
1. Prepare the cinnamon filling - In a medium bowl stir together the melted butter, brown sugar and cinnamon until combined. It should be the consistency of toothpaste. Scoop into a heavy-duty zip bag or piping bag and set aside.
2.Prepare the cream cheat glaze - In a small bowl, whisk yogurt and sugar until smooth and reaches desired consistency. I like mine a little thicker.
3. Prepare the pancake batter - In a medium bowl whisk together flour, baking powder and salt. Whisk in the milk, egg, oil and vanilla until the batter is just moistened (a few tiny lumps are okay).
4. Heat a non-stick pan over medium heat and melt a tsp. of butter in the center. Using an ice cream scoop or 1/3 cup measuring cup, add the batter to the pan, one or two pancakes at a time depending on the size of your pan. Remember to leave room for the pancakes to spread out a bit. Reduce heat to low and take the cinnamon filling baggie and snip the tip off with a pair of scissors. Starting from the center of the pancake, gently squeeze the bag, creating a swirling pattern toward the outside of the pancake. Don't get too carried away though, you don't want the sugar to melt OFF the sides. Wait until tiny bubbles begin to pop in the center of the pancake and it is golden brown in the bottom. Then gently, but quickly flip it. This takes a bit of practice, but you will shortly be a master pancake flipper. Cook another 2-3 minutes until the other side is golden brown, and reveal the magic! Flip onto a plate and you will see that the cinnamon filling has cratered the pancake in a swirl pattern. I like to swirl a bit more of the cinnamon filling in the crater for extra yumminess!
5. Repeat until your batter is used up. Stack pancakes and drizzle with cream cheat glaze. Now go and enjoy that masterpiece.
-001.JPG)
Hopefully y'all love this recipe as much as we do. This is definitely a Sunday staple in my house! Feel free to leave questions and comments below and let me know how yours turned out!
Until next time!
xo Jenn
Wednesday, 9 January 2013
A Happy New Year
Hello all and Happy New Years!!!!
I hope you all had a wonderful Christmas and a restful holiday!
Well, I survived my first year hosting Christmas for my husband's family and it was a complete success! Although I can't take all the credit, my little kitchen fairy (mum-in-law) was there to lend a helping hand when I needed it (mostly cleaning up after me).
We decided to have a fusion British-Canadian Christmas to celebrate me and my husband's first Christmas as a married couple and included our most favorite dishes, like bread pudding and sweet potato casserole. Yum! I also took it upon myself to do a little pre-Christmas baking and went, well, perhaps a little overboard? Never.
-001.JPG)
I am back to blogging...at least until next Christmas anyway! After all the time, effort, and love put into making Christmas, I was completely spoiled to bits!
Needless to say, the blog got a little neglected and I didn't quite finish my twelve days of Christmas. So, to make up for it, I found some amazing recipes that I would LOVE to have around my table next Christmas!
What are you most looking forward to making next Christmas?
Blog Lovin':
1. Panforte - a spicy medieval Christmas cake! Y'all know I love my spices and this sounds right up my alley!
2. Millionaire's Shortbread - three words: chocolate, caramel, shortbread....heaven! This is probably one of my favorite desserts on the planet! I want to make it every year, but never do!
3. No-Bake Mochaccino Cookies - cookies AND coffee? I'm in. These look divine.
4. Chocolate Salami - I keep hearing about this stuff and I seriously NEED to try it!
5. White Chocolate Macadamia Coconut Truffles - I absolutely adore truffles and these sound like tropical heaven!
6. Red Velvet Cookies - Cause who doesn't love a little red velvet in their life? No one, that's who. ;)
7. Peppermint and Candy Cane Cake - this cake. Gorgeous! Imagine that little beauty atop the Christmas table! Swoon!
I am already excited for next Christmas! I definitely have to try these out!
Until next time folks!
xo Jenn
I hope you all had a wonderful Christmas and a restful holiday!
Well, I survived my first year hosting Christmas for my husband's family and it was a complete success! Although I can't take all the credit, my little kitchen fairy (mum-in-law) was there to lend a helping hand when I needed it (mostly cleaning up after me).
We decided to have a fusion British-Canadian Christmas to celebrate me and my husband's first Christmas as a married couple and included our most favorite dishes, like bread pudding and sweet potato casserole. Yum! I also took it upon myself to do a little pre-Christmas baking and went, well, perhaps a little overboard? Never.
-001.JPG)
I am back to blogging...at least until next Christmas anyway! After all the time, effort, and love put into making Christmas, I was completely spoiled to bits!
Needless to say, the blog got a little neglected and I didn't quite finish my twelve days of Christmas. So, to make up for it, I found some amazing recipes that I would LOVE to have around my table next Christmas!
What are you most looking forward to making next Christmas?
Blog Lovin':
1. Panforte - a spicy medieval Christmas cake! Y'all know I love my spices and this sounds right up my alley!
2. Millionaire's Shortbread - three words: chocolate, caramel, shortbread....heaven! This is probably one of my favorite desserts on the planet! I want to make it every year, but never do!
3. No-Bake Mochaccino Cookies - cookies AND coffee? I'm in. These look divine.
4. Chocolate Salami - I keep hearing about this stuff and I seriously NEED to try it!
5. White Chocolate Macadamia Coconut Truffles - I absolutely adore truffles and these sound like tropical heaven!
6. Red Velvet Cookies - Cause who doesn't love a little red velvet in their life? No one, that's who. ;)
7. Peppermint and Candy Cane Cake - this cake. Gorgeous! Imagine that little beauty atop the Christmas table! Swoon!
I am already excited for next Christmas! I definitely have to try these out!
Until next time folks!
xo Jenn
Sunday, 23 December 2012
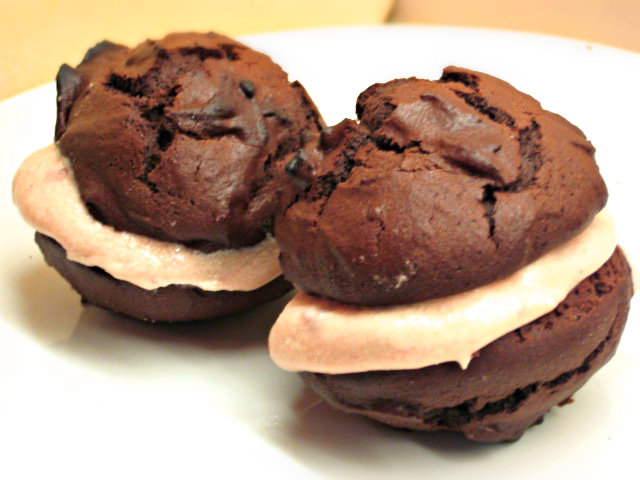
Fruitcake Whoopie Pies
On the fifth day of Christmas my true love gave to me, fruit cake whoopie....pies! Okay, well you got to give me some credit that was almost a rhyme.
Oh my goodness, is Christmas really in two days!?! It's time to take your battle positions people, this is not a drill!
But fruitcake whoopie pies? FRUITCAKE? Oh yes. From a person who is not particularly fond of fruitcake, you will love this nicer, lighter, and overall friendlier version of said evil pudding. Don't believe me? Try it for yourself! ;)
After many failed attempts each year to create a fruitcake that isn't quite so vile, I had finally thrown in the towel and called it quits. This cake was not meant to taste good. Don't get me wrong, I love the idea of fruitcake and all the flavors it encompasses, it's just something about the texture that makes my body squeal "don't feed me cement"! And so I moved on for a while, until one evening in the kitchen making gingerbread, I had a thought: what if fruitcake could be in a different, tastier form? What if fruitcake, perhaps, wasn't a cake at all?
The moment it dawned on me, I dropped everything to create my monster. And you know what? It worked.
I'm not sure why this recipe never occurred to me before! It is absolutely delicious and will, hopefully, change your opinion on fruitcake! So here it is, try it and let me know what you think!
.jpg)
Fruitcake Whoopie Pies
makes approx. 10 large pies
Ingredients:
3 3/4 cups plain flour
1 tsp. salt
1 tsp. baking soda
1 1/2 tsp. ground ginger
1 1/2 tsp. ground cinnamon
1/4 tsp. ground cloves
1/4 tsp. ground nutmeg
3/4 cup softened butter (unsalted)
3/4 cup brown sugar
1 egg
3/4 cup molasses (black treacle)
3/4 cup buttermilk
filling:
1/2 cup butter
2 cups powdered sugar
1 tsp. rum extract
2 tbsp. maraschino cherries, finely chopped
1 tbsp. raisins
1/2 tbsp. candied ginger, finely chopped
1 tbsp. walnuts, chopped
1/2 tbsp. dates, chopped
1 tbsp. milk, more or less depending on desired consistency
*note: the filling includes my favorite dried fruits in a fruitcake, but you can add whatever suits your tastes!
Method:
1. Preheat oven to 375 F. (190 C.) and line three baking sheets with parchment paper.
2. In a medium bowl whisk together flour, salt, baking soda and spices and set aside.
3. In another bowl (preferably bowl of a mixer) whip brown sugar and butter until light and fluffy; should take about two minutes. Scrape the sides and add the egg and beat until well incorporated.
4. Add half of the dry ingredients and mix to combine. Add molasses, the remaining dry ingredients, and the buttermilk.
5. Once the ingredients are completely combined and the dough is formed, scoop 1/4 cup balls out on a baking sheet, 6 per sheet. Bake for fifteen minutes, or until a toothpick inserted into the center comes out clean. Cool on baking sheet on wire rack.
6. While pies are cooling, beat butter in mixer on high until light and fluffy. Turn mixer down to low and add powdered sugar, 1/2 cup at a time and continue to mix on low until all sugar is combined. Add rum extract and mix until combined. Add desired dried and candied fruits and a splash of milk if it looks too thick.
7. When pies are completely cooled, frost them with your fruitcake filling.
.jpg)
There you have it! Un-fruitcake! I hope you enjoy this recipe and many more to come, I just want to thank each and every one of you for taking the time to read my humble little blog! It means so much and I hope this blog will continue to blossom from all your help, I couldn't do it without you! I hope this season fills you with happiness, love and a whole lotta' lovin' from your oven!
From all of us to all of you, Happy Holidays and Merry Christmas!
xo Jenn
Oh my goodness, is Christmas really in two days!?! It's time to take your battle positions people, this is not a drill!
But fruitcake whoopie pies? FRUITCAKE? Oh yes. From a person who is not particularly fond of fruitcake, you will love this nicer, lighter, and overall friendlier version of said evil pudding. Don't believe me? Try it for yourself! ;)
After many failed attempts each year to create a fruitcake that isn't quite so vile, I had finally thrown in the towel and called it quits. This cake was not meant to taste good. Don't get me wrong, I love the idea of fruitcake and all the flavors it encompasses, it's just something about the texture that makes my body squeal "don't feed me cement"! And so I moved on for a while, until one evening in the kitchen making gingerbread, I had a thought: what if fruitcake could be in a different, tastier form? What if fruitcake, perhaps, wasn't a cake at all?
The moment it dawned on me, I dropped everything to create my monster. And you know what? It worked.
I'm not sure why this recipe never occurred to me before! It is absolutely delicious and will, hopefully, change your opinion on fruitcake! So here it is, try it and let me know what you think!
.jpg)
Fruitcake Whoopie Pies
makes approx. 10 large pies
Ingredients:
3 3/4 cups plain flour
1 tsp. salt
1 tsp. baking soda
1 1/2 tsp. ground ginger
1 1/2 tsp. ground cinnamon
1/4 tsp. ground cloves
1/4 tsp. ground nutmeg
3/4 cup softened butter (unsalted)
3/4 cup brown sugar
1 egg
3/4 cup molasses (black treacle)
3/4 cup buttermilk
filling:
1/2 cup butter
2 cups powdered sugar
1 tsp. rum extract
2 tbsp. maraschino cherries, finely chopped
1 tbsp. raisins
1/2 tbsp. candied ginger, finely chopped
1 tbsp. walnuts, chopped
1/2 tbsp. dates, chopped
1 tbsp. milk, more or less depending on desired consistency
*note: the filling includes my favorite dried fruits in a fruitcake, but you can add whatever suits your tastes!
Method:
1. Preheat oven to 375 F. (190 C.) and line three baking sheets with parchment paper.
2. In a medium bowl whisk together flour, salt, baking soda and spices and set aside.
3. In another bowl (preferably bowl of a mixer) whip brown sugar and butter until light and fluffy; should take about two minutes. Scrape the sides and add the egg and beat until well incorporated.
4. Add half of the dry ingredients and mix to combine. Add molasses, the remaining dry ingredients, and the buttermilk.
5. Once the ingredients are completely combined and the dough is formed, scoop 1/4 cup balls out on a baking sheet, 6 per sheet. Bake for fifteen minutes, or until a toothpick inserted into the center comes out clean. Cool on baking sheet on wire rack.
6. While pies are cooling, beat butter in mixer on high until light and fluffy. Turn mixer down to low and add powdered sugar, 1/2 cup at a time and continue to mix on low until all sugar is combined. Add rum extract and mix until combined. Add desired dried and candied fruits and a splash of milk if it looks too thick.
7. When pies are completely cooled, frost them with your fruitcake filling.
.jpg)
There you have it! Un-fruitcake! I hope you enjoy this recipe and many more to come, I just want to thank each and every one of you for taking the time to read my humble little blog! It means so much and I hope this blog will continue to blossom from all your help, I couldn't do it without you! I hope this season fills you with happiness, love and a whole lotta' lovin' from your oven!
From all of us to all of you, Happy Holidays and Merry Christmas!
xo Jenn
Wednesday, 19 December 2012
Maple Gingerbread Cookies
Hello all! It's the fourth day of my 12 Days of Christmas Revamp!
I absolutely love gingerbread. Recently, I can't seem to get enough of the stuff in my system! So for my fellow gingerbread freaks out there, this will seriously knock your socks off: Maple Gingerbread Cookies. Just let that soak in for a minute and think 'WHY HAVEN'T I THOUGHT OF THIS BEFORE'!
Personally, I have always had a hard time finding a good gingerbread recipe; they were always a bit to crunchy or too strong in taste, but this discovery has changed all that.
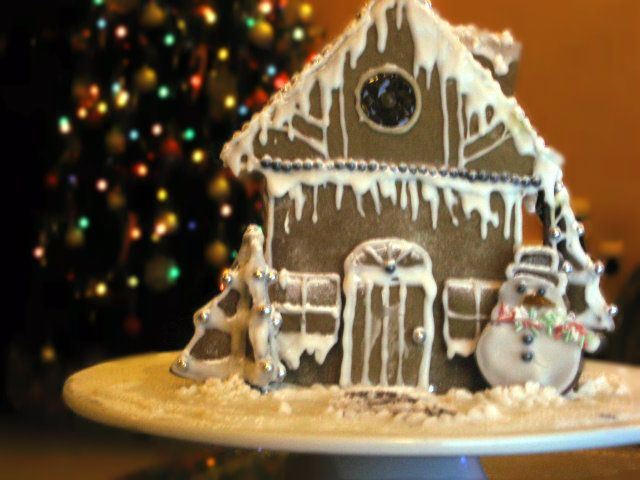
Now I understand that adding some maple syrup to gingerbread cookies is a bit stereotypical to my deep seeded Canuck (Canadian) within, but honestly this will be my go to recipe from now on. The cookies are strong enough to hold their shape (say if you wanted to build a gingerbread house like I did), but still deliciously soft when you bite into them. I have finally found a happy balance of spice and texture!
Now let the magic begin! (sorry about the photo quality, in between cameras at the moment!)
Maple Gingerbread Cookies
makes approx. 24 cookies
Ingredients:
5 1/2 cups plain flour, plus more for dusting
1 tsp. baking soda
1 1/2 tsp. salt
4 tsp. ground ginger
4 tsp. ground cinnamon
1 1/2 tsp. ground cloves
1 tsp ground nutmeg
1 cup butter
1 cup brown sugar
2 large eggs
3/4 cup maple syrup
1/2 cup molasses
Royal Icing, for frosting (optional)
Method:
1. Whisk together flour, baking soda, salt and spices in a medium bowl until well mixed.
2. Beat butter and sugar in a mixer on medium-high speed until fluffy and pale. Add eggs one at a time, beat after each addition. Reduce speed to low and add maple syrup and molasses. Gradually add flour mixture and beat until just combined. Divide dough into 3 portions, wrap in cling film and refrigerate for at least an hour. It is best to freeze this dough if you can, I froze my batch for two days: it's a great make-ahead recipe.
3. Preheat oven to 350 degrees F (170 C). If you haven't previously frozen your dough, roll dough out to about 1/4 inch thick on a very floured piece of parchment paper (on a baking sheet) and freeze for 15 minutes.
4. Cut out desired shapes, transfer back to parchment lined baking sheets and freeze for another 15 mins. See why it's just easier to freeze in the first place? ;)
5. Bake cookies for 6 minutes. Remove sheets from the oven and tap them firmly on the counter to flatten (this is not a crucial step they will just be a bit fluffier if you don't). Return to oven and cook until crisp but not darkened, 6-8 minutes. Let cool on sheets on wire racks.
6. Ice with your favorite icing; I prefer royal icing cause it dries and is easiest to transfer.
Seriously, you will LOVE this recipe and it may even slightly change your life.
Until next time!
xo Jenn
I absolutely love gingerbread. Recently, I can't seem to get enough of the stuff in my system! So for my fellow gingerbread freaks out there, this will seriously knock your socks off: Maple Gingerbread Cookies. Just let that soak in for a minute and think 'WHY HAVEN'T I THOUGHT OF THIS BEFORE'!
Personally, I have always had a hard time finding a good gingerbread recipe; they were always a bit to crunchy or too strong in taste, but this discovery has changed all that.
Now I understand that adding some maple syrup to gingerbread cookies is a bit stereotypical to my deep seeded Canuck (Canadian) within, but honestly this will be my go to recipe from now on. The cookies are strong enough to hold their shape (say if you wanted to build a gingerbread house like I did), but still deliciously soft when you bite into them. I have finally found a happy balance of spice and texture!
Now let the magic begin! (sorry about the photo quality, in between cameras at the moment!)

Maple Gingerbread Cookies
makes approx. 24 cookies
Ingredients:
5 1/2 cups plain flour, plus more for dusting
1 tsp. baking soda
1 1/2 tsp. salt
4 tsp. ground ginger
4 tsp. ground cinnamon
1 1/2 tsp. ground cloves
1 tsp ground nutmeg
1 cup butter
1 cup brown sugar
2 large eggs
3/4 cup maple syrup
1/2 cup molasses
Royal Icing, for frosting (optional)
Method:
1. Whisk together flour, baking soda, salt and spices in a medium bowl until well mixed.
2. Beat butter and sugar in a mixer on medium-high speed until fluffy and pale. Add eggs one at a time, beat after each addition. Reduce speed to low and add maple syrup and molasses. Gradually add flour mixture and beat until just combined. Divide dough into 3 portions, wrap in cling film and refrigerate for at least an hour. It is best to freeze this dough if you can, I froze my batch for two days: it's a great make-ahead recipe.
3. Preheat oven to 350 degrees F (170 C). If you haven't previously frozen your dough, roll dough out to about 1/4 inch thick on a very floured piece of parchment paper (on a baking sheet) and freeze for 15 minutes.
4. Cut out desired shapes, transfer back to parchment lined baking sheets and freeze for another 15 mins. See why it's just easier to freeze in the first place? ;)
5. Bake cookies for 6 minutes. Remove sheets from the oven and tap them firmly on the counter to flatten (this is not a crucial step they will just be a bit fluffier if you don't). Return to oven and cook until crisp but not darkened, 6-8 minutes. Let cool on sheets on wire racks.
6. Ice with your favorite icing; I prefer royal icing cause it dries and is easiest to transfer.
Seriously, you will LOVE this recipe and it may even slightly change your life.
Until next time!
xo Jenn
Sunday, 16 December 2012
Irish Coffee Truffles
Hey all, it's the third day of Christmas in my 12 Days of Christmas Revamp series! I'm back and things are going to get a bit crazy on the blog, because I have finally started my CHRISTMAS BAKING!
This is my favorite part of Christmastime! The hustle bustle, the jolly feelings and, of course, the oodles of endless baking bursting from the kitchen!
One of my favorite holiday treats is truffles. I have made almost every variation under the sun, and these little dandies never let me down. They are so simple you will wonder why you have never made them before, honestly!
And today I made the most sinfully divine truffles I have ever tasted...maybe it's because I have a serious problem with Irish cream. Believe me, if you have only ever had plain chocolate truffles this may change your life. In addition to the dark chocolate, these little babies have coffee and a wee bit of Bailey's just to make things interesting. So here it is folks, give it a try, you will not regret it. :)
Drum roll please........

Irish Coffee Truffles
makes approx. 20 truffles
Ingredients:
1 cup plus 2 tbsp. (200 grams) dark chocolate
2 tbsp. butter (give or take)
2 tbsp. Bailey's Irish Cream (I used homemade)
1 tbsp. instant coffee granules (crushed)
cocoa
Method:
1. Chop the chocolate into small pieces and place bowl over saucepan half filled with water over medium-low heat. Stir until the chocolate is melted completely.
2. Remove from heat and add coffee granules. Stir until coffee is completely dissolved, this may take a while. Stir until chocolate cools down to room temperature.
3. When the chocolate is tempered, add the butter and Irish cream and stir until the chocolate begins to thicken slightly.
4. When completely combined, place bowl in the fridge for a least a good hour and a half.
5. After an hour, the mixture should be thickened and scoop-able. Using a regular teaspoon, scoop out mixture and roll into 1 inch balls. Set the truffles on a baking sheet lined with baking paper and return to the fridge to set up.
6. After about fifteen minutes, your truffles should be ready to embellish! I rolled mine in cocoa, which emphasizes the flavor of the chocolate a little more, but you could use anything from icing sugar to sprinkles! Whatever looks pretty. :)
And that's all she wrote! Serve em' up on a shiny platter and show off your mad truffle skills to all your guests!
I hope you all enjoy them, they are slightly addictive. Sorry about that!
If you haven't already, feel free to follow me on my twitter page: https://twitter.com/ovenwarm
Until next time!
xo Jenn
This is my favorite part of Christmastime! The hustle bustle, the jolly feelings and, of course, the oodles of endless baking bursting from the kitchen!
One of my favorite holiday treats is truffles. I have made almost every variation under the sun, and these little dandies never let me down. They are so simple you will wonder why you have never made them before, honestly!
And today I made the most sinfully divine truffles I have ever tasted...maybe it's because I have a serious problem with Irish cream. Believe me, if you have only ever had plain chocolate truffles this may change your life. In addition to the dark chocolate, these little babies have coffee and a wee bit of Bailey's just to make things interesting. So here it is folks, give it a try, you will not regret it. :)
Drum roll please........

Irish Coffee Truffles
makes approx. 20 truffles
Ingredients:
1 cup plus 2 tbsp. (200 grams) dark chocolate
2 tbsp. butter (give or take)
2 tbsp. Bailey's Irish Cream (I used homemade)
1 tbsp. instant coffee granules (crushed)
cocoa
Method:
1. Chop the chocolate into small pieces and place bowl over saucepan half filled with water over medium-low heat. Stir until the chocolate is melted completely.
2. Remove from heat and add coffee granules. Stir until coffee is completely dissolved, this may take a while. Stir until chocolate cools down to room temperature.
3. When the chocolate is tempered, add the butter and Irish cream and stir until the chocolate begins to thicken slightly.
4. When completely combined, place bowl in the fridge for a least a good hour and a half.
5. After an hour, the mixture should be thickened and scoop-able. Using a regular teaspoon, scoop out mixture and roll into 1 inch balls. Set the truffles on a baking sheet lined with baking paper and return to the fridge to set up.
6. After about fifteen minutes, your truffles should be ready to embellish! I rolled mine in cocoa, which emphasizes the flavor of the chocolate a little more, but you could use anything from icing sugar to sprinkles! Whatever looks pretty. :)
And that's all she wrote! Serve em' up on a shiny platter and show off your mad truffle skills to all your guests!
I hope you all enjoy them, they are slightly addictive. Sorry about that!
If you haven't already, feel free to follow me on my twitter page: https://twitter.com/ovenwarm
Until next time!
xo Jenn
Tuesday, 11 December 2012
Sticky Orange Gingerbread Cake
It's time for the second recipe of the Twelve Days of Christmas Revamp with sticky orange gingerbread cake! Oh yes.
This current holiday season I seem to be obsessed with ginger; it's warm, spicy and basically encapsulates Christmas in your mouth. I find myself adding a dash of ginger to nearly everything I eat (okay well most things) just to replicate this divine spice of Christmas.
Okay, so I know sticky gingerbread cake isn't anything new, but let me just clear the air--this is the gingeriest gingerbread cake you will ever taste! Oh my, it is an absolute treat! But what makes this the gingeriest gingerbread cake, you ask? My secret weapon: ginger preserve and candied ginger!
I have always had a love affair with putting candied ginger in my baking. And being a serious ginger connoisseur, it definitely adds that extra ka-pow that my taste buds yearn for. Now, of course you can make candied ginger, but if you're anything like me (and don't have time), my all-time favourite is The Ginger People's crystallized Ginger Chips. They are absolutely perfect for baking and come already chopped into tiny bits, so you don't end up with a spicy giant clump of ginger scorching your poor tongue. Seriously, check them out, http://www.gingerpeople.com/crystallized-ginger/crystallized-ginger-chips.html. I use them in everything. :)
And as for the jam, I first encountered ginger preserve when I first moved to England. Oh. My. Goodness. Why don't we have this in Canada?!? I actually don't think I can function without it in my life anymore. It's the best, trust me. ;)
Anyway, back to the recipe!!!
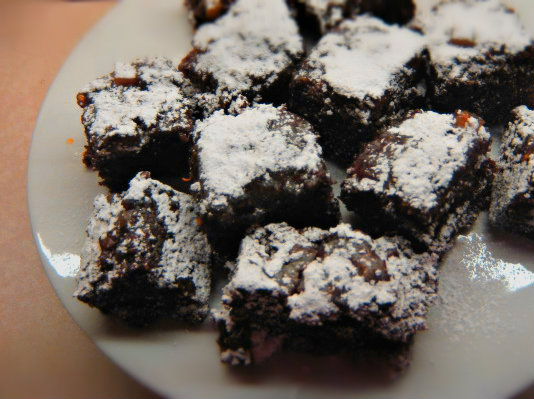
Sticky Orange Gingerbread cake:
makes about 20 squares
Ingredients:
2/3 cups butter
7 Tbsp. golden syrup (corn syrup)
7 Tbsp. molasses
1/2 cup plus 1 Tbsp. brown (muscovado) sugar
2 tsp. crystallized ginger chips
1 tsp. ground cinnamon
1 tsp. ground ginger
1/4 tsp. ground cloves
1 tsp. baking soda, dissoled in 2 Tbsp. of warm water
1 cup full-fat milk
2 eggs, beaten to mix
1 1/2 cups plus 1 Tbsp. plain flour
glaze:
1/4 cup ginger preserve
juice of half an orange
zest of half an orange
icing sugar, for dusting
Method:
1. Preheat your oven to 170 degrees Celsius (350 F). Line an ovenproof dish (approx 30cm X 20cm) with parchment paper (or grease it real good with butter).
2. In a saucepan, melt butter over a low heat along with syrup, sugar, molasses, ginger chips and spices.
3. Take off the heat when sugar is dissolved and add milk, eggs and baking soda-water mixture.
4. Measure the flour into a bowl and pour in the liquid ingredients, beating until well mixed. It will be pretty liquidy, but don't worry, this adds to the stickiness later!
5. Pour into prepared pan and bake for 45-60 minutes depending on your oven. Bake until risen and firm on top, but be careful not to over bake, as a little stickiness is a good thing.Transfer pan to a wire rack and let cool.
6. In the meantime, heat ginger preserve, orange juice and zest in a saucepan over medium-low heat until liquidy and sugar has dissolved.
7. Poke several holes into the surface of the gingerbread with a skewer, this will let the glaze seep into the cake. It's best to do this when it's still warm. Pour the glaze on top of the gingerbread and spread into all the tiny holes.
8. Cut into 20 square and dust with icing sugar. Serve and enjoy!
This recipe is perfect for entertaining a little or a lot of guests! I hope you enjoy it as much as I do and I dare you to eat just one!
Until next time!
xo Jenn
This current holiday season I seem to be obsessed with ginger; it's warm, spicy and basically encapsulates Christmas in your mouth. I find myself adding a dash of ginger to nearly everything I eat (okay well most things) just to replicate this divine spice of Christmas.
Okay, so I know sticky gingerbread cake isn't anything new, but let me just clear the air--this is the gingeriest gingerbread cake you will ever taste! Oh my, it is an absolute treat! But what makes this the gingeriest gingerbread cake, you ask? My secret weapon: ginger preserve and candied ginger!
I have always had a love affair with putting candied ginger in my baking. And being a serious ginger connoisseur, it definitely adds that extra ka-pow that my taste buds yearn for. Now, of course you can make candied ginger, but if you're anything like me (and don't have time), my all-time favourite is The Ginger People's crystallized Ginger Chips. They are absolutely perfect for baking and come already chopped into tiny bits, so you don't end up with a spicy giant clump of ginger scorching your poor tongue. Seriously, check them out, http://www.gingerpeople.com/crystallized-ginger/crystallized-ginger-chips.html. I use them in everything. :)
And as for the jam, I first encountered ginger preserve when I first moved to England. Oh. My. Goodness. Why don't we have this in Canada?!? I actually don't think I can function without it in my life anymore. It's the best, trust me. ;)
Anyway, back to the recipe!!!

Sticky Orange Gingerbread cake:
makes about 20 squares
Ingredients:
2/3 cups butter
7 Tbsp. golden syrup (corn syrup)
7 Tbsp. molasses
1/2 cup plus 1 Tbsp. brown (muscovado) sugar
2 tsp. crystallized ginger chips
1 tsp. ground cinnamon
1 tsp. ground ginger
1/4 tsp. ground cloves
1 tsp. baking soda, dissoled in 2 Tbsp. of warm water
1 cup full-fat milk
2 eggs, beaten to mix
1 1/2 cups plus 1 Tbsp. plain flour
glaze:
1/4 cup ginger preserve
juice of half an orange
zest of half an orange
icing sugar, for dusting
Method:
1. Preheat your oven to 170 degrees Celsius (350 F). Line an ovenproof dish (approx 30cm X 20cm) with parchment paper (or grease it real good with butter).
2. In a saucepan, melt butter over a low heat along with syrup, sugar, molasses, ginger chips and spices.
3. Take off the heat when sugar is dissolved and add milk, eggs and baking soda-water mixture.
4. Measure the flour into a bowl and pour in the liquid ingredients, beating until well mixed. It will be pretty liquidy, but don't worry, this adds to the stickiness later!
5. Pour into prepared pan and bake for 45-60 minutes depending on your oven. Bake until risen and firm on top, but be careful not to over bake, as a little stickiness is a good thing.Transfer pan to a wire rack and let cool.
6. In the meantime, heat ginger preserve, orange juice and zest in a saucepan over medium-low heat until liquidy and sugar has dissolved.
7. Poke several holes into the surface of the gingerbread with a skewer, this will let the glaze seep into the cake. It's best to do this when it's still warm. Pour the glaze on top of the gingerbread and spread into all the tiny holes.
8. Cut into 20 square and dust with icing sugar. Serve and enjoy!
This recipe is perfect for entertaining a little or a lot of guests! I hope you enjoy it as much as I do and I dare you to eat just one!
Until next time!
xo Jenn
Tuesday, 27 November 2012
Salted Caramel Eggnog
On the first day of Christmas my true love gave to me ...a glass of eggnog?
December is almost here and what a better way to celebrate than with the "12 days of Christmas Re-vamp" and the classic Christmas favourite, eggnog!
I ADORE eggnog. It is my absolute favourite yuletide treat! Sadly, England hasn't quite boarded the eggnog train yet and it's near impossible to find the stuff anywhere around here! So, it was time to buck up the courage and finally make my own.
I could literally drink vats of the stuff, but I was feeling frisky and wanted to try something a little experimental: salted caramel eggnog. Salted caramels seem to be the 'it' sweet at the moment and I wanted to embrace every aspect of its delectable taste. Call me crazy, but this is one of the most delicious recipes I have tasted in a while! And extremely simple, you will honestly never buy the carton stuff again!

Salted Caramel Eggnog
Makes approx. 4 1/2 cups
Ingredients
- 1 15 oz can of sweetened condensed milk
- 1 Tbsp butter
- 3 cups of milk, more or less depending on preference
- 1/2 tsp vanilla flavouring
- 1/4 tsp salt, more or less depending on preference
- 4 egg yolks
- 1/4 tsp nutmeg
Method
December is almost here and what a better way to celebrate than with the "12 days of Christmas Re-vamp" and the classic Christmas favourite, eggnog!
I ADORE eggnog. It is my absolute favourite yuletide treat! Sadly, England hasn't quite boarded the eggnog train yet and it's near impossible to find the stuff anywhere around here! So, it was time to buck up the courage and finally make my own.
I could literally drink vats of the stuff, but I was feeling frisky and wanted to try something a little experimental: salted caramel eggnog. Salted caramels seem to be the 'it' sweet at the moment and I wanted to embrace every aspect of its delectable taste. Call me crazy, but this is one of the most delicious recipes I have tasted in a while! And extremely simple, you will honestly never buy the carton stuff again!

Salted Caramel Eggnog
Makes approx. 4 1/2 cups
Ingredients
- 1 15 oz can of sweetened condensed milk
- 1 Tbsp butter
- 3 cups of milk, more or less depending on preference
- 1/2 tsp vanilla flavouring
- 1/4 tsp salt, more or less depending on preference
- 4 egg yolks
- 1/4 tsp nutmeg
Method
- Separate eggs and place yolks in a bowl and whisk until very frothy and bubbly, set aside.
- In a saucepan, gently melt the tablespoon of butter. Add the vanilla and sweetened condensed milk and bring to a boil, stirring constantly until mixture has thickened and darkened in colour slightly. This is your caramel!
- Slowly add milk to the caramel mixture, stirring constantly over medium heat until the caramel is combined with the milk and no hard bits remain. If you added the milk to fast and the caramel solidified, just bring to a boil and stir until they are visibly gone.
- Allow mixture to COOL to room temperature or it will scramble your eggs! When mixture is cool, add salt and nutmeg. Stir gently, but briskly into the frothy egg yolks
Serve with a sprinkling of sea salt and nutmeg on the top for that extra pop of flavour! And there you have it, salted caramel eggnog done! Holidays got you feeling frisky? Add a dash of bourbon, rum or brandy and let the cheer begin!
Stay jolly folks!
xo Jenn
Thursday, 15 November 2012
Spreading the Holiday Cheer!
As the cool winter weather rushes in I have the sudden urge to listen to rather folksy music, slap on the uggs and replace the rest of the items in my wardrobe with knitted versions of themselves. Perhaps it's the deep-seeded canuck in me that craves this cold (or as some would call 'bleak') winter weather. But there is something really magical about the winter season: the air is brisk, the kindness of humanity is at an all time high, and did I mention the FOOD?
This is the time of year that I tend to shine, or as some say (ie. my husband) go a bit looney-tunes in the 'spreading the holiday cheer' department. Fortunately he loves the season just as much as I do, so in a way it kind of compensates.
But let's get serious for a moment, that special feeling of sparkly rainbows dancing in your tummy is often a result of people adding that extra something (ie fat and sugar) to every holiday recipe. Some of my earliest and happiest childhood memories are baking shortbread cookies with my grandma: secretly eating little bits of raw cookie dough when the adults 'weren't looking,' the smell of maraschino cherries lingering in the air and the excitement that came with seeing those beauties come out of the oven all golden. So if you find yourself craving that spine-tingling, heart stopping pleasure center that is holiday food: look no further my friends, you have arrived. :)
So here's the pitch, I am going to do a series of recipes leading up to the holidays that are some of my absolute favorites: traditional recipes with a modern twist! Think for a moment, of butter tarts (a traditional favourite in my household); now imagine replacing the raisin-y bit with a pink sugar plum version of itself. o_0 Yes, I think this will be a wonderful holiday. These are definitely not your Granny's recipes so stay tuned for the festivities!
This will be known hence as the Twelve days of Christmas Bake-athon!!! I really want to hear what y`all have to think about all these as well, so please comment away! Feel free to send along requests or to share your favourite holiday recipes!
Until next time folks I will leave you with this:
What was your fondest memory of holiday baking when you were young?
Leave your answer in the comments!
xo Jenn
This is the time of year that I tend to shine, or as some say (ie. my husband) go a bit looney-tunes in the 'spreading the holiday cheer' department. Fortunately he loves the season just as much as I do, so in a way it kind of compensates.
But let's get serious for a moment, that special feeling of sparkly rainbows dancing in your tummy is often a result of people adding that extra something (ie fat and sugar) to every holiday recipe. Some of my earliest and happiest childhood memories are baking shortbread cookies with my grandma: secretly eating little bits of raw cookie dough when the adults 'weren't looking,' the smell of maraschino cherries lingering in the air and the excitement that came with seeing those beauties come out of the oven all golden. So if you find yourself craving that spine-tingling, heart stopping pleasure center that is holiday food: look no further my friends, you have arrived. :)
So here's the pitch, I am going to do a series of recipes leading up to the holidays that are some of my absolute favorites: traditional recipes with a modern twist! Think for a moment, of butter tarts (a traditional favourite in my household); now imagine replacing the raisin-y bit with a pink sugar plum version of itself. o_0 Yes, I think this will be a wonderful holiday. These are definitely not your Granny's recipes so stay tuned for the festivities!
This will be known hence as the Twelve days of Christmas Bake-athon!!! I really want to hear what y`all have to think about all these as well, so please comment away! Feel free to send along requests or to share your favourite holiday recipes!
Until next time folks I will leave you with this:
What was your fondest memory of holiday baking when you were young?
Leave your answer in the comments!
xo Jenn
Sunday, 24 June 2012
Mexican Chocolate Cookies
Hey all! It’s my first recipe post!
Two words: chocolate and caramel. What is more
decadent and indulgent than that? How about Mexican chocolate and caramel? These spicy Mexican chocolate cookies have a luxurious brownie-like texture and are slathered in caramel sauce that is guaranteed to pull you out of any slump!
Just take a look
and try not to drool.

Yes, please.
There is something so magical about
combining cinnamon and chocolate; simple, but it really takes any food to a
whole new level of flavour. I absolutely love how cinnamon tastes with
chocolate and I put it in everything
from cookies to coffee. I have even tried a Mexican chocolate chili dish; call
me crazy, but it was actually amazing. This recipe was a combination of many of my favourite flavours, namely chocolate, cinnamon and caramel. And while I usually save these flavours for fall and winter baking, I had an especially nagging craving that summer foods could not satisfy.

Mexican
Chocolate Cookies:
Makes about 2 dozen large
cookies
Ingredients:
4
¼ cups flour
½
cup cocoa
4
½ tsp. baking powder
¾
tsp. salt
1
¼ tsp. cinnamon
1
½ cups sugar
3
large eggs
2
tsp. vanilla extract
1
½ cups butter
Method:
1.
In
a medium bowl, sift together flour, cocoa, baking powder, cinnamon and salt.
Set aside.
2.
In
a large bowl or bowl of mixer, whisk butter and sugar together until light and
fluffy, about three minutes. Add in eggs one at a time, mixing well after each
addition. Add in vanilla and mix well.
3.
Slowly
add the dry mixture to the wet mixture and stir gently until incorporated. The
dough should not stick to the bowl very much at this point. Cover dough and
refrigerate for 1 hour.
4.
When
you are ready to bake the cookies, turn oven to 350 F. Spoon out about two
Tbsp. of dough and form into a ball in the palm of your hand. Place on cookie
sheet with parchment/baking paper and flatten slightly. Place cookies about 2-3
inches apart.
5. Bake
for 10-12 minutes. You want the cookies to be a little underdone in the middle
to give them that chewy texture.
These delightfully delicious sweets are incredibly easy
to make and a perfect complement to a steaming hot cup of coffee, although they
hardly require coffee as an excuse to eat!
In addition to the cookies I made the caramel sauce
as well, with a slight twist of course. I find that unless I am specifically
baking with heavy cream, I don’t tend to just have it on hand to cook with. So,
as you may have guessed, this is a cream-less caramel recipe. No, it doesn’t
make it any healthier, but I can always hope! If you have any spare caramel you
can store it in an airtight container in the fridge. It tastes great on pretty
much anything from coffee to ice cream.

Savvy-girl
Caramel Sauce:
Makes approx. 1 cup
Ingredients:
1 cup white sugar
1 cup white sugar
1/4 cup. milk
2 Tbsp. butter
1 tsp. corn flour/starch
Method:
1.
In a saucepan over low heat, cook sugar until it is melted, whisking
consistently. It should be clear and light caramel in colour.
2.
Add butter and continue to whisk. It will froth up a bit but just keep whisking
until it is incorporated. Add milk and whisk to blend, should be frothy and
caramel in colour. If it turns dark brown or black, it is burnt.
3.
Remove from heat immediately and stir in the corn flour. I like to mix my corn flour in a
separate cup with some of the mixture and then adding it to avoid lumps, rather
than dumping it all in at once. Stir occasionally, it will thicken as it cools. If it turns out too thick, add a little more milk until it is the consistency you desire.
You
can either drizzle on the caramel, or just dunk them right in it! And there you
have it, Mexican chocolate cookies with caramel sauce! Enjoy!
xoxo Jenn
Wednesday, 20 June 2012
Warm Welcome

Hi there! My name is Jenn and I am the author/baker/photographer
behind the Ovenwarm blog. I grew up spliced in the middle of a menagerie of
home-grown, pie making, cake baking, food loving women. Between baking millions
of homemade apple pies with my grandmas (great aunt's included), or eating
frosting like it was my job, it was only natural that baking became a central
part of my life. Those who know me definitely know I have had an ongoing love
affair with sugar since I was young.
First things first: I am by no means a trained chef. While I may
go to culinary school in the future, all my recipes thus far are based on trial
and error, or "happy accidents" as I like to call them. In addition
to my own recipes, I will be sharing some re-vamped family oldies for all those
who still appreciate simple treats that taste amazing.
My approach to baking is taking things back to basics, sticking to
my roots while celebrating and adding to the family recipe book. I’m not about
fancy baking by any means. For me, if it tastes good, you’ve done good.
As for the name, ovenwarm
represents that cozy feeling you get when you can smell something delicious
baking away in the oven. In my house, the oven is always on: food brings people
together, the sense of family and love that comes with baking is one of the
reasons that I love it so much.
I aspire to one day be the grandma with the gigantic cookbook and practical,
but encyclopedic knowledge of baking. But for now I’m just a misplaced
Canadian, currently living in England, enjoying all the perks of planning a
wedding and being in love with my wonderful fiancé! In addition to baking I
love reading, Victorian memorabilia, piping hot cups of tea, practically
anything with four legs and fur, and doing my makeup about 40 times a day. I am
passionate about baking and put a lot of love into everything I do. I hope you
enjoy my journey to change the world one cupcake at a time!
xoxo Jenn
.jpg)
Subscribe to:
Posts (Atom)